Effortless cannabis germination with autoflowering starter kit.
Starting cannabis seeds can be a nerve-wracking endeavor, but fear not! This auto-flowering starter kit is here to simplify the process and set your plants up for success.
NOTE: This Starter kit comes with three seeds of the ever-popular “White Widow” or Wedding Cake..
The perfect growing medium with microbial activity.
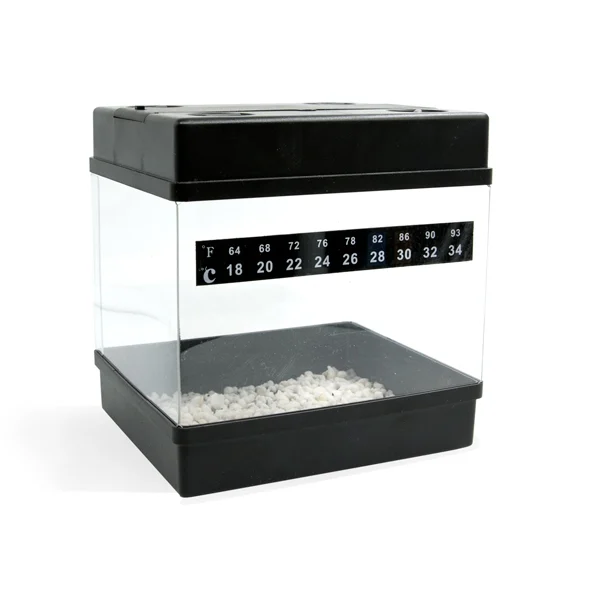
This kit provides a superb germination environment with the inclusion of Propagator Pro (complete with perlite and LED lighting), Easy Start pots, and Bacto packets containing a blend of beneficial bacteria.
This microbial activity is crucial for a healthy start.
The kit includes three white widow automatic seeds.
10 Steps to Seamless Germination.
- Gently remove the seeds from the packaging, avoiding any damage.
- Retrieve the Easy Start kit and ensure you have the bag of Bacto packets from beneath the sticker.
- Prepare approximately one liter of lukewarm water (around 25°C or 77°F) in a plastic container. It should feel slightly cool against your wrist.
- Add the Bacto packets to the water, allowing them to dissolve. Gently stir to activate the essential germination microbes.
- Place a layer of perlite at the base of the propagator.
- Briefly immerse the Easy Start pots in the water for 5–10 seconds.
- Position the pots in the propagator on top of the perlite, letting some of the water from the pots lightly dampen the perlite. Ensure it’s slightly moist, not excessively wet, to prevent seedling rot.
- Enlarge the holes in the pots to a depth of 5–10 millimeters, ideally using a screwdriver marked with tape for precision.
- Plant each seed in a separate hole, orientation doesn’t matter. Ensure they’re positioned at the bottom of the hole for effective rooting, and lightly cover with soil.
- Seal the propagator with its lid and resist the urge to open it. The humidity and heat levels within are crucial for optimal growth.
Adding batteries to your royal queen seeds starter kit.
- Locate the battery compartment under the LEDs. Detach the lid by applying pressure to one side.
- Remove the batteries from their plastic wrapper. Insert them according to the + and – indicators inside the compartment.
- Test by touching the tactile pad. If inserted correctly, the LEDs will illuminate. Reattach the lid until it clicks securely in place.